

Festive cardboard wreath
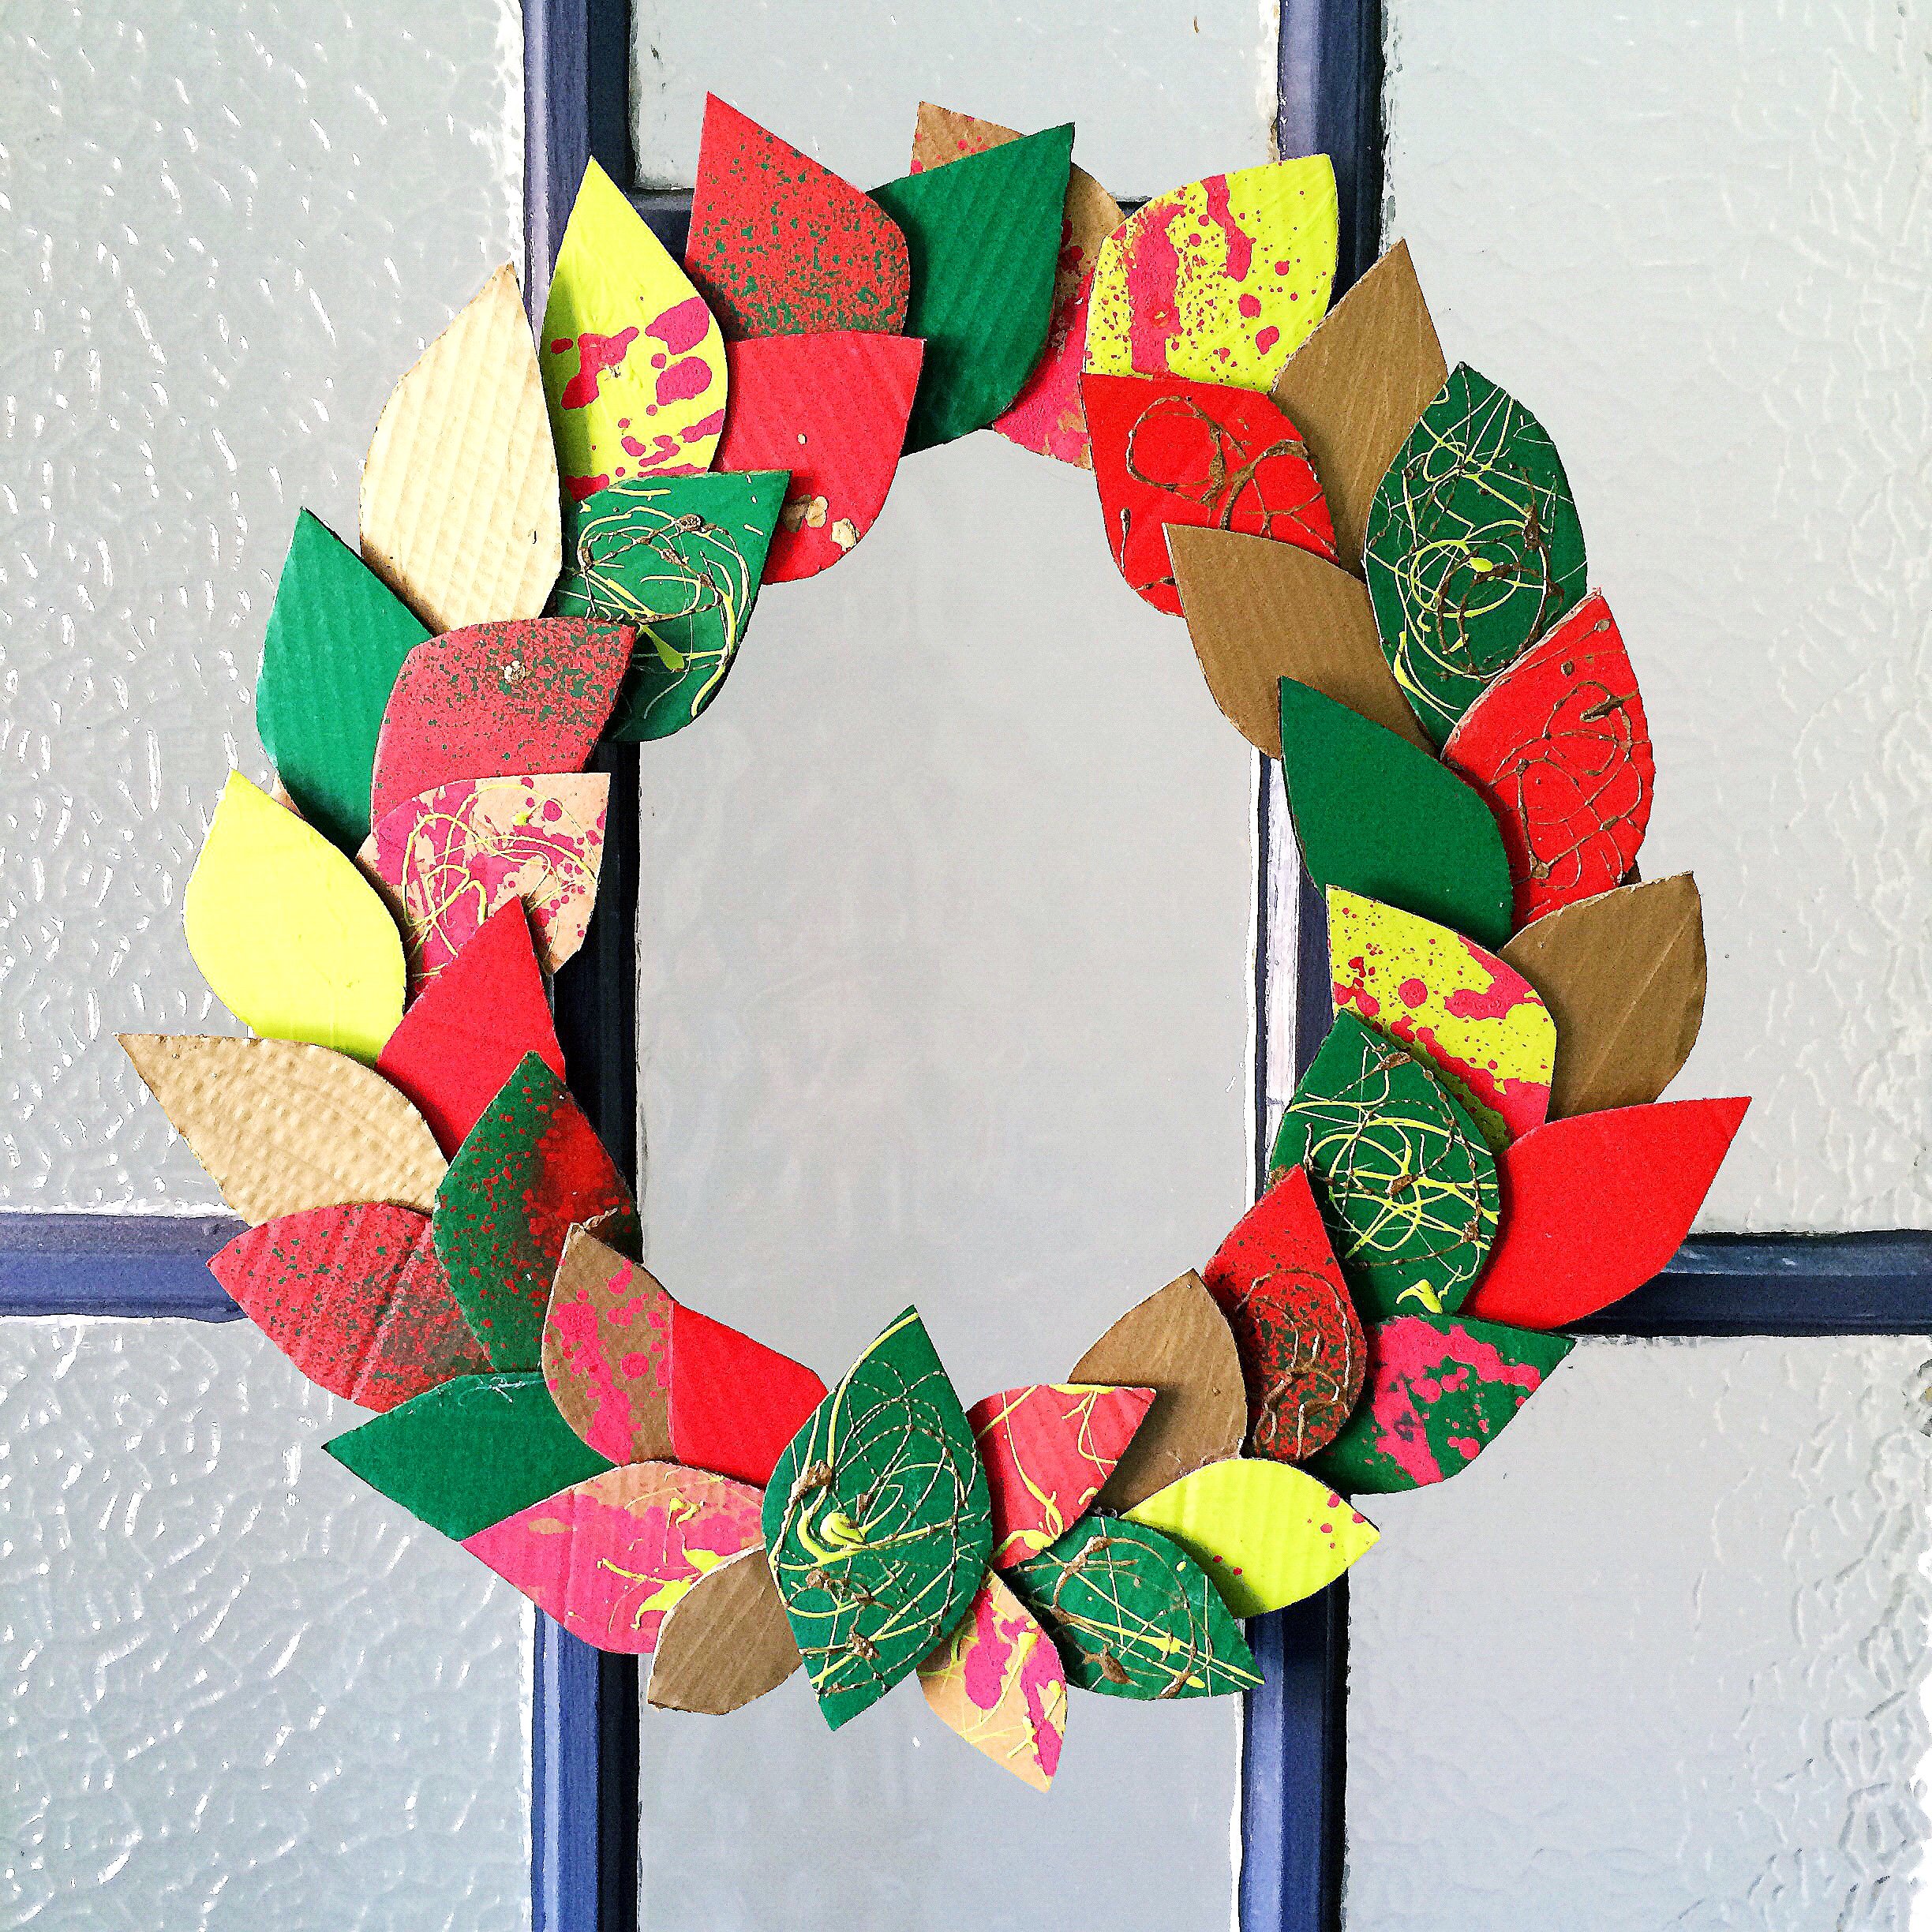
What better way to welcome in the silliest of seasons than with this fun cardboard wreath. This is a great collaborative project to do with kids of any age or a nice thing to do alone for some adult making time.
What you need:
Recycled cardboard (something not too thick)
Paint (we used spray paint and acrylic paint)
Spray bottles and brushes
Glue (we used hot glue but PVA would work fine too)

To make:
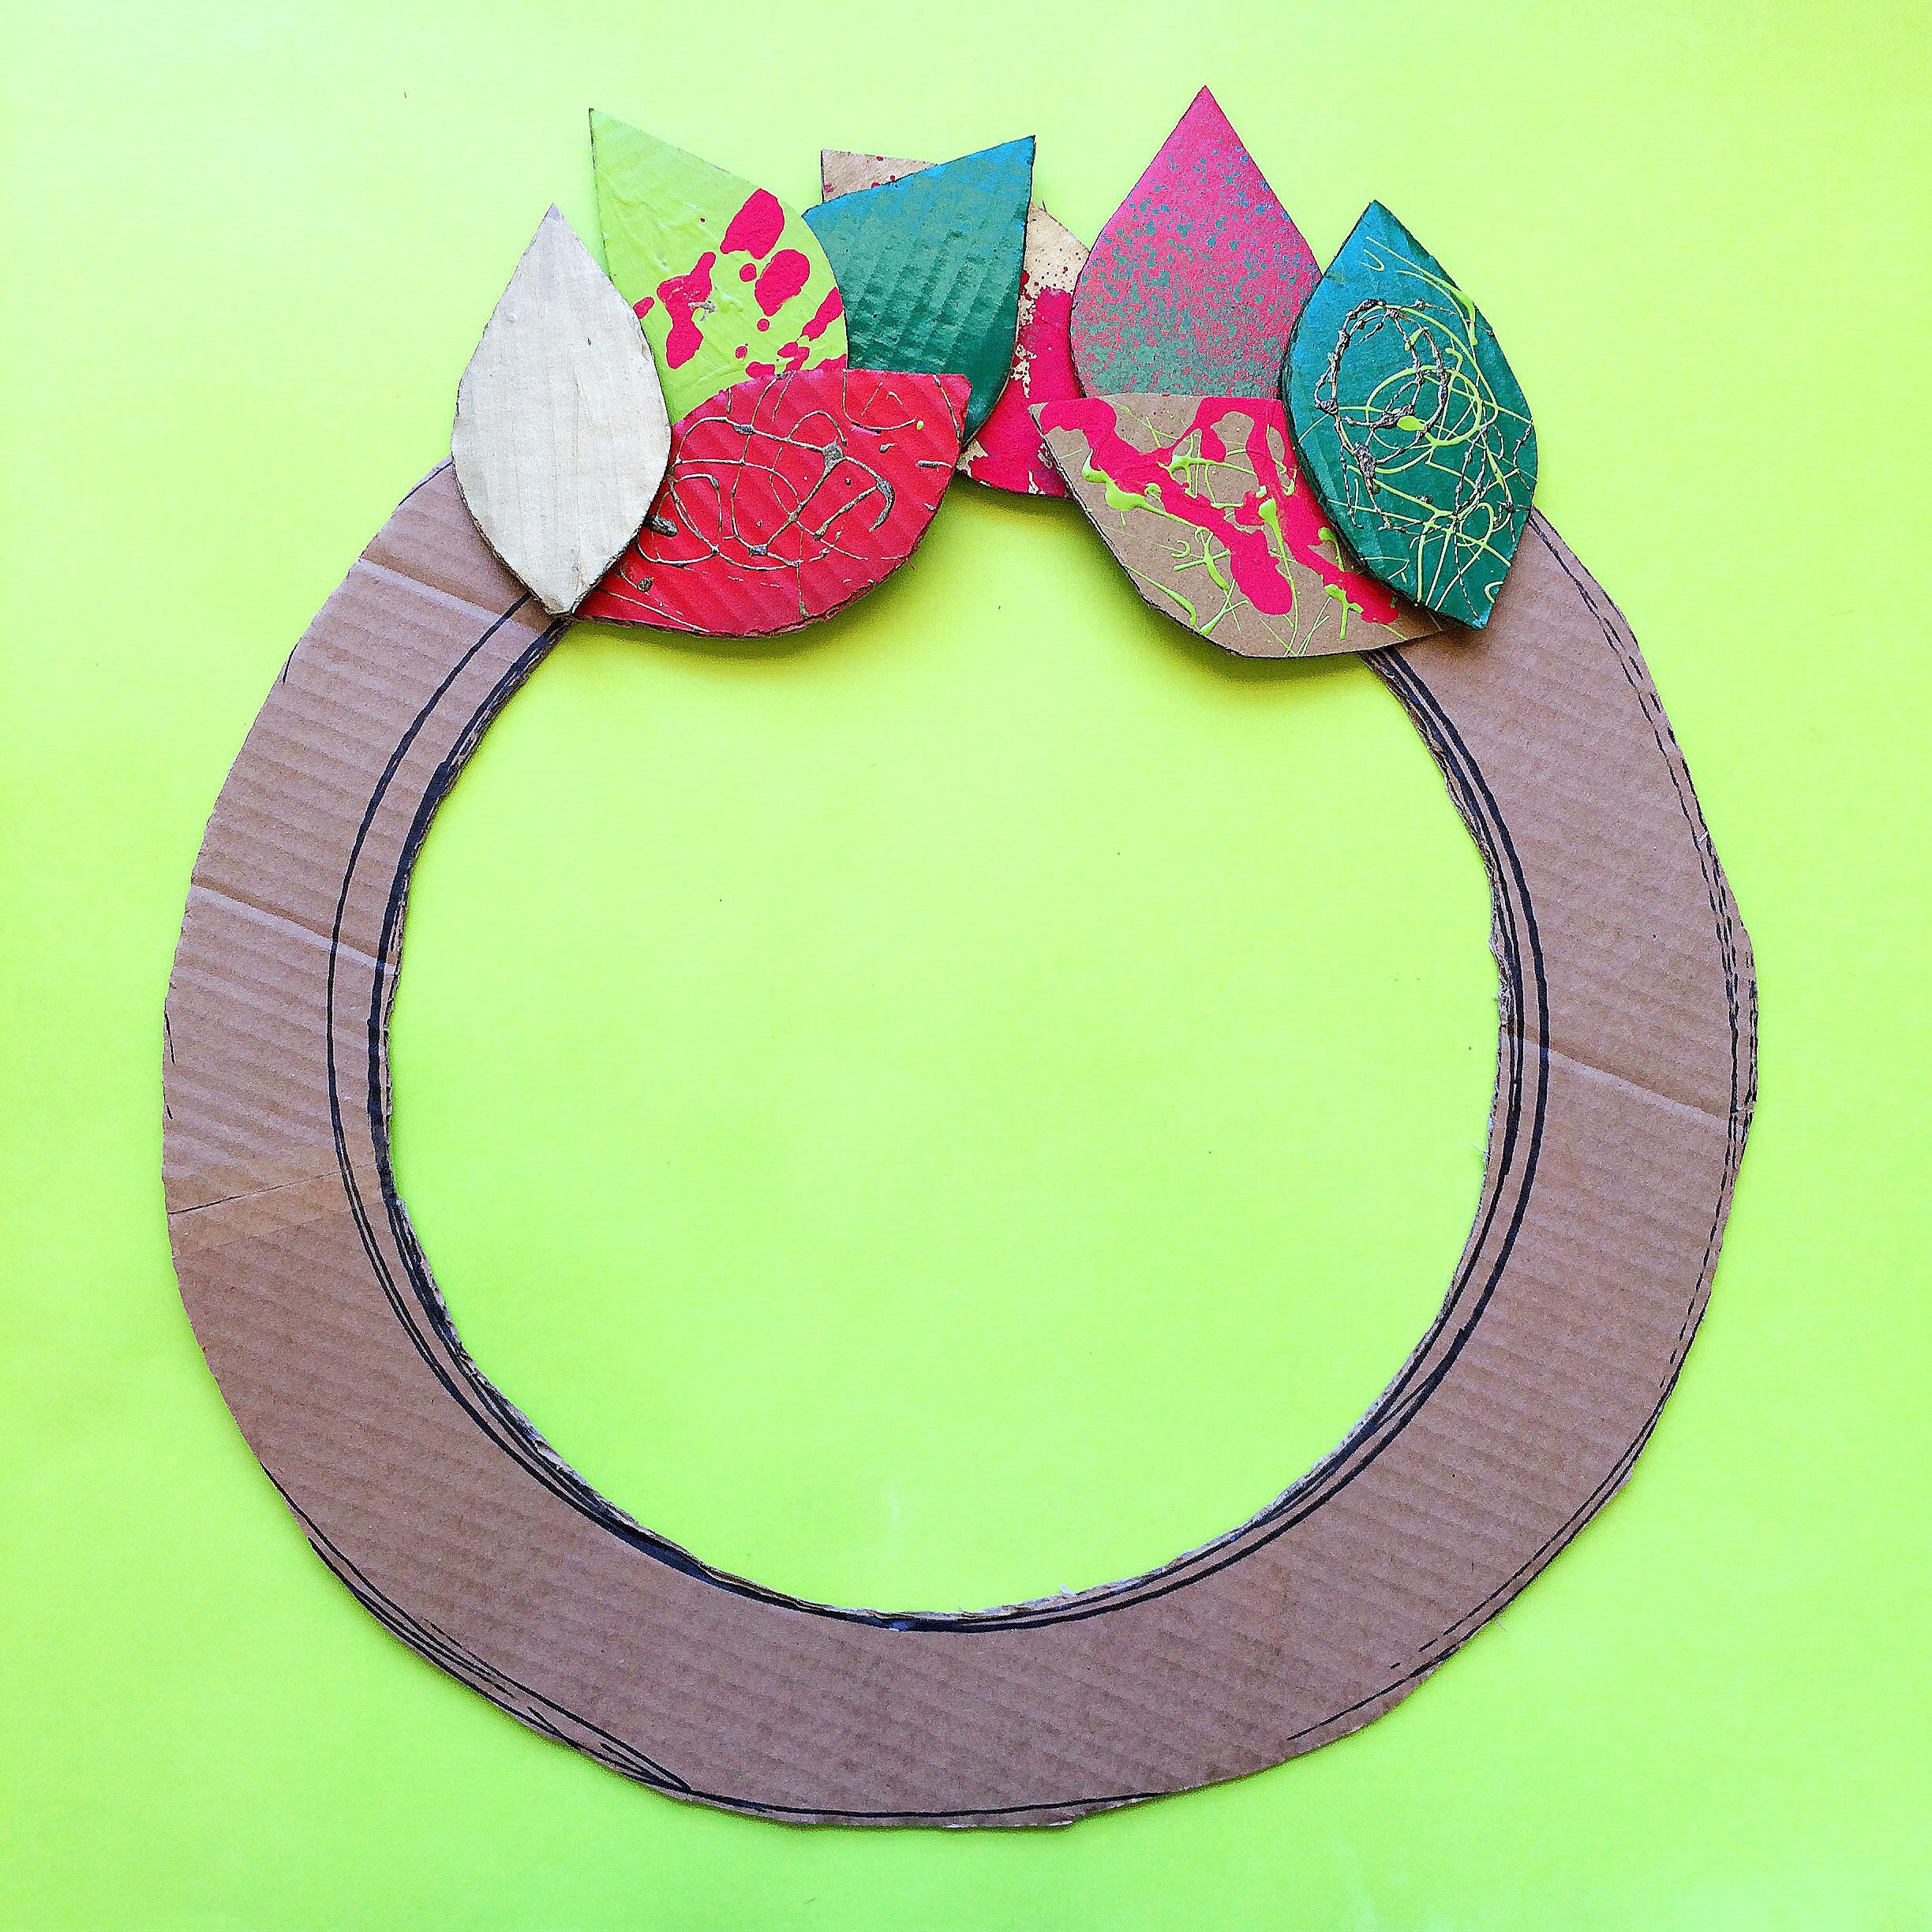
1. Begin by drawing a large circle onto some card. I traced around a large salad bowl to get an even outer circle. Draw a smaller circle inside this circle to make a ring shape. The ring should be about 5 or 6cm wide.
2. Cut out the inner part of the circle. I scored my card in the middle and then cut from the inside out but you could use a scalpel here or just slice through the ring and then tape it up after you have cut out the middle.
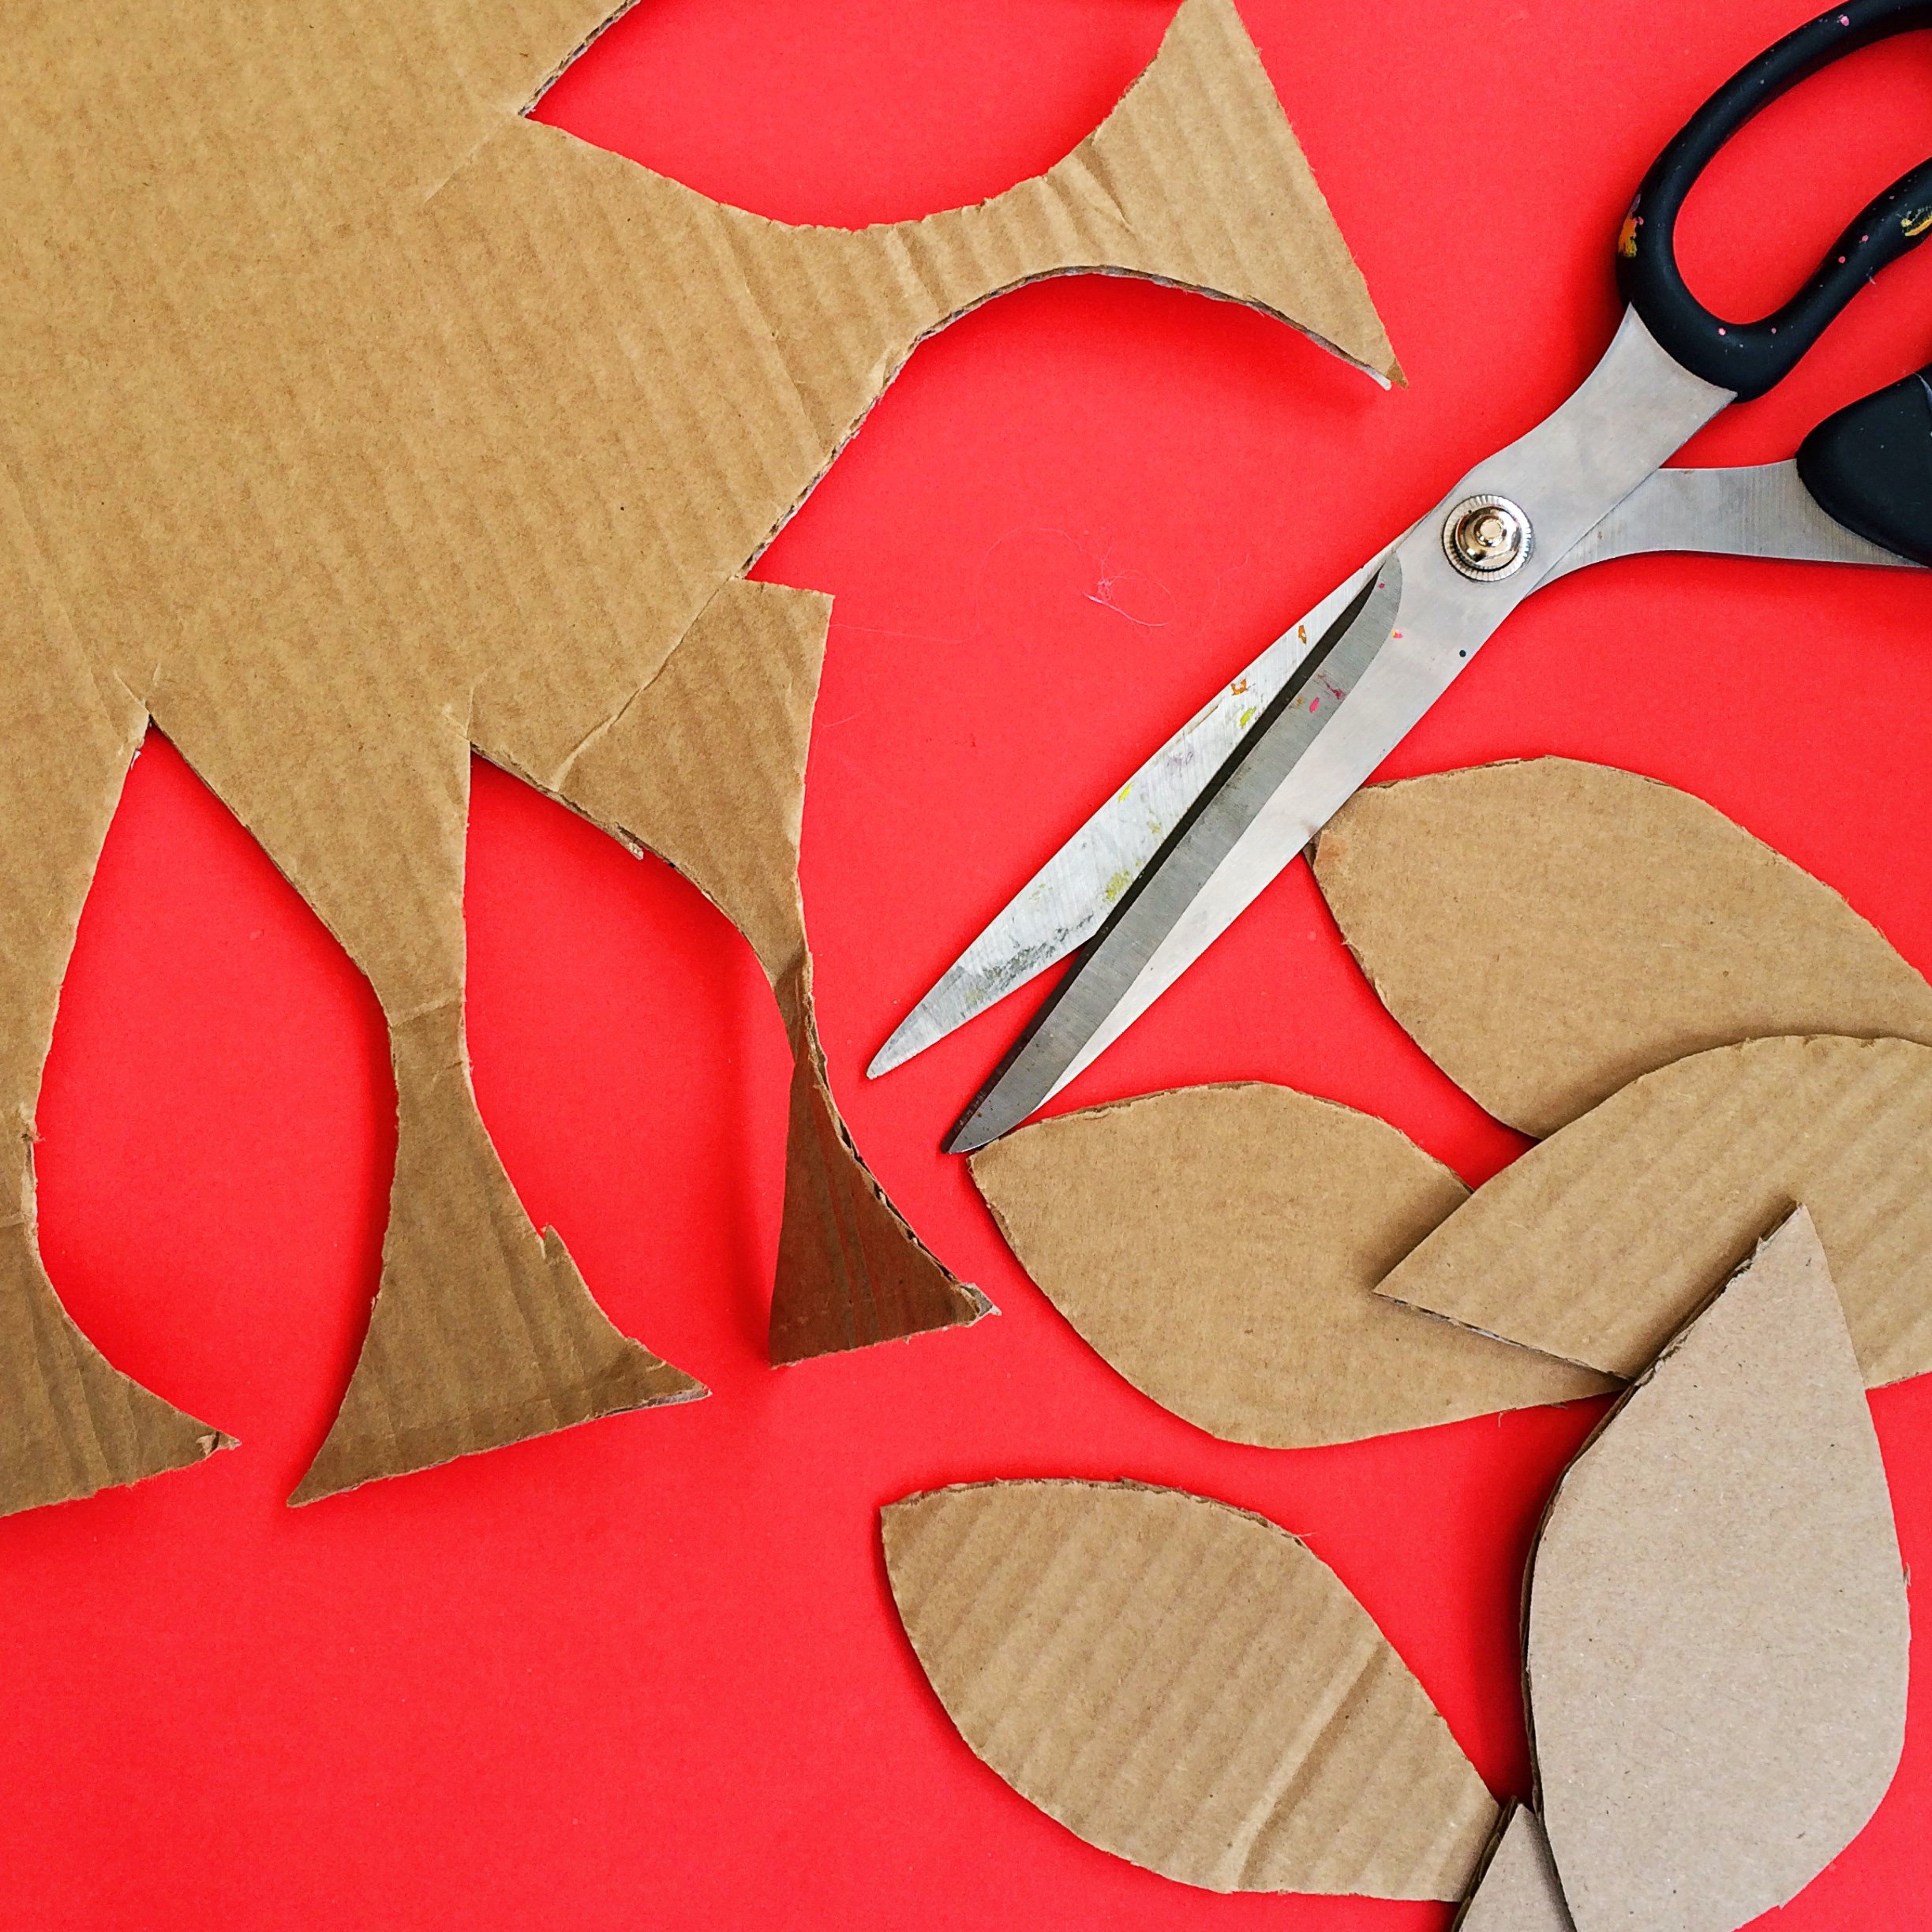
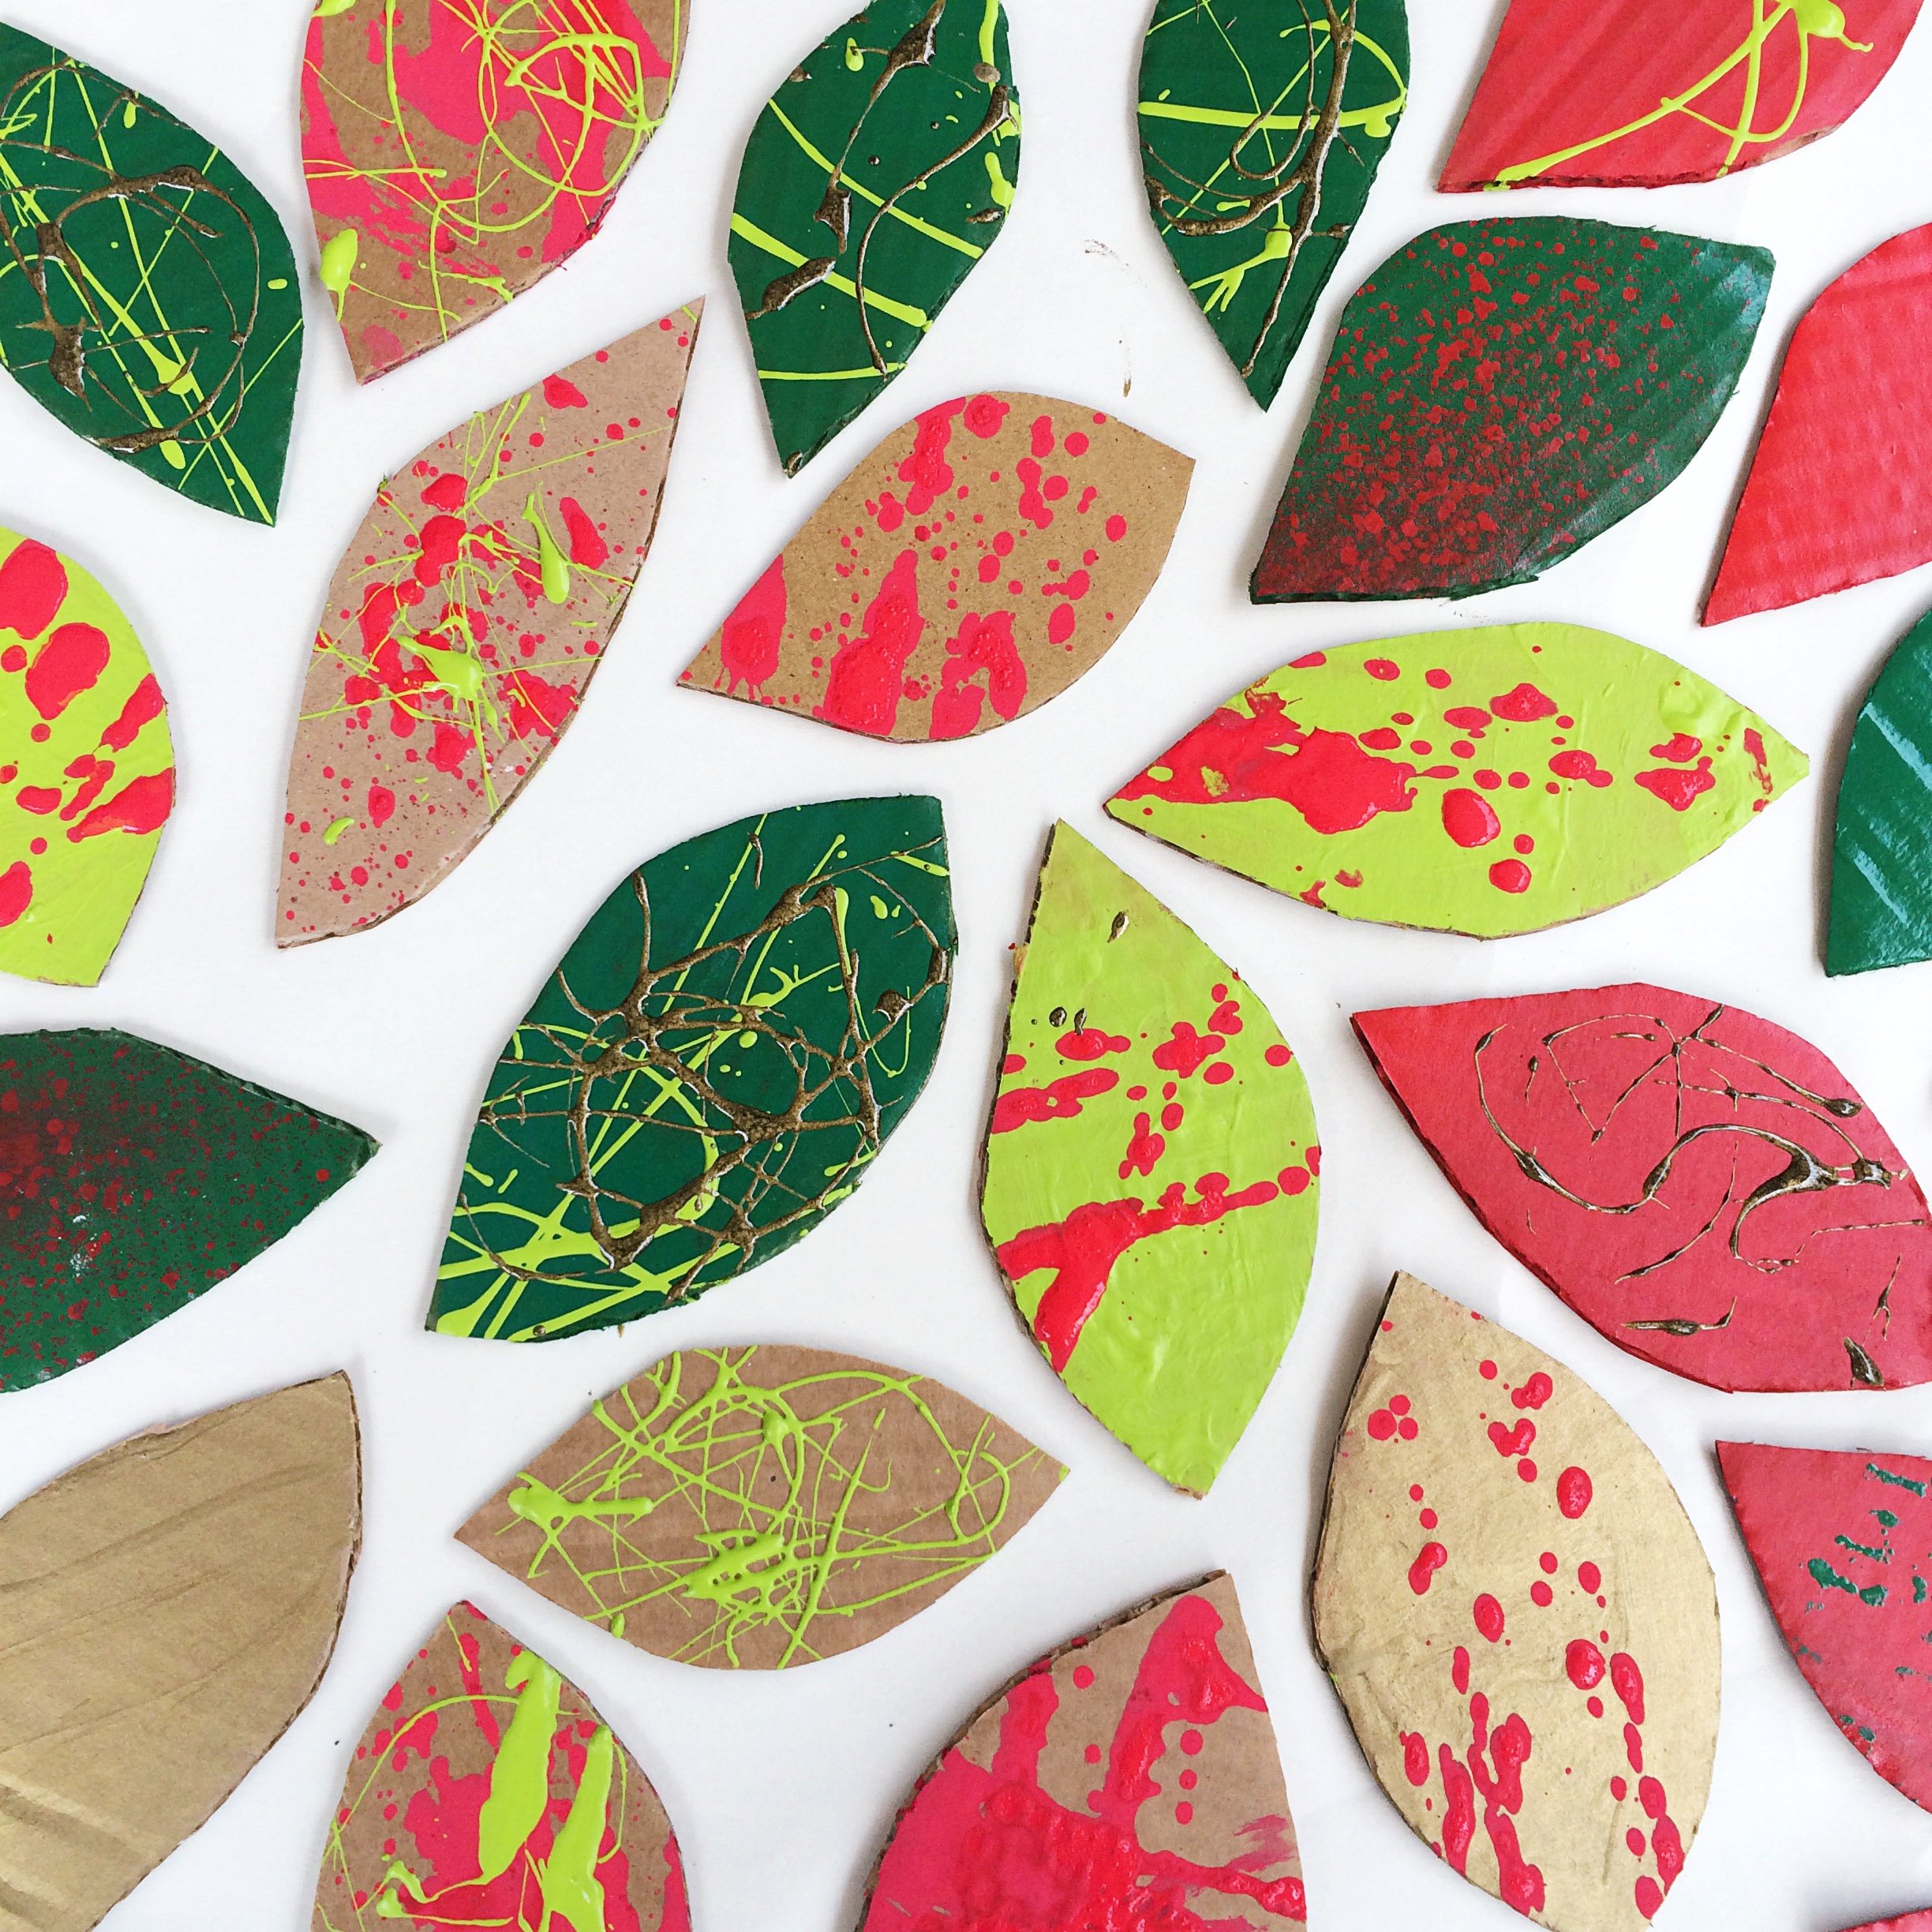
3. Cut out a stack of leaves from the remaining cardboard. I cut mine freehand as it is a simple shape and I like things to be a bit irregular but if you prefer, you can cut one, trace it and then cut the rest to match. I used about 40 leaves on ours, so aim for about this many. As a guide, ours ranged in length from about 8cm -12cm long and about 5-6 cm wide.
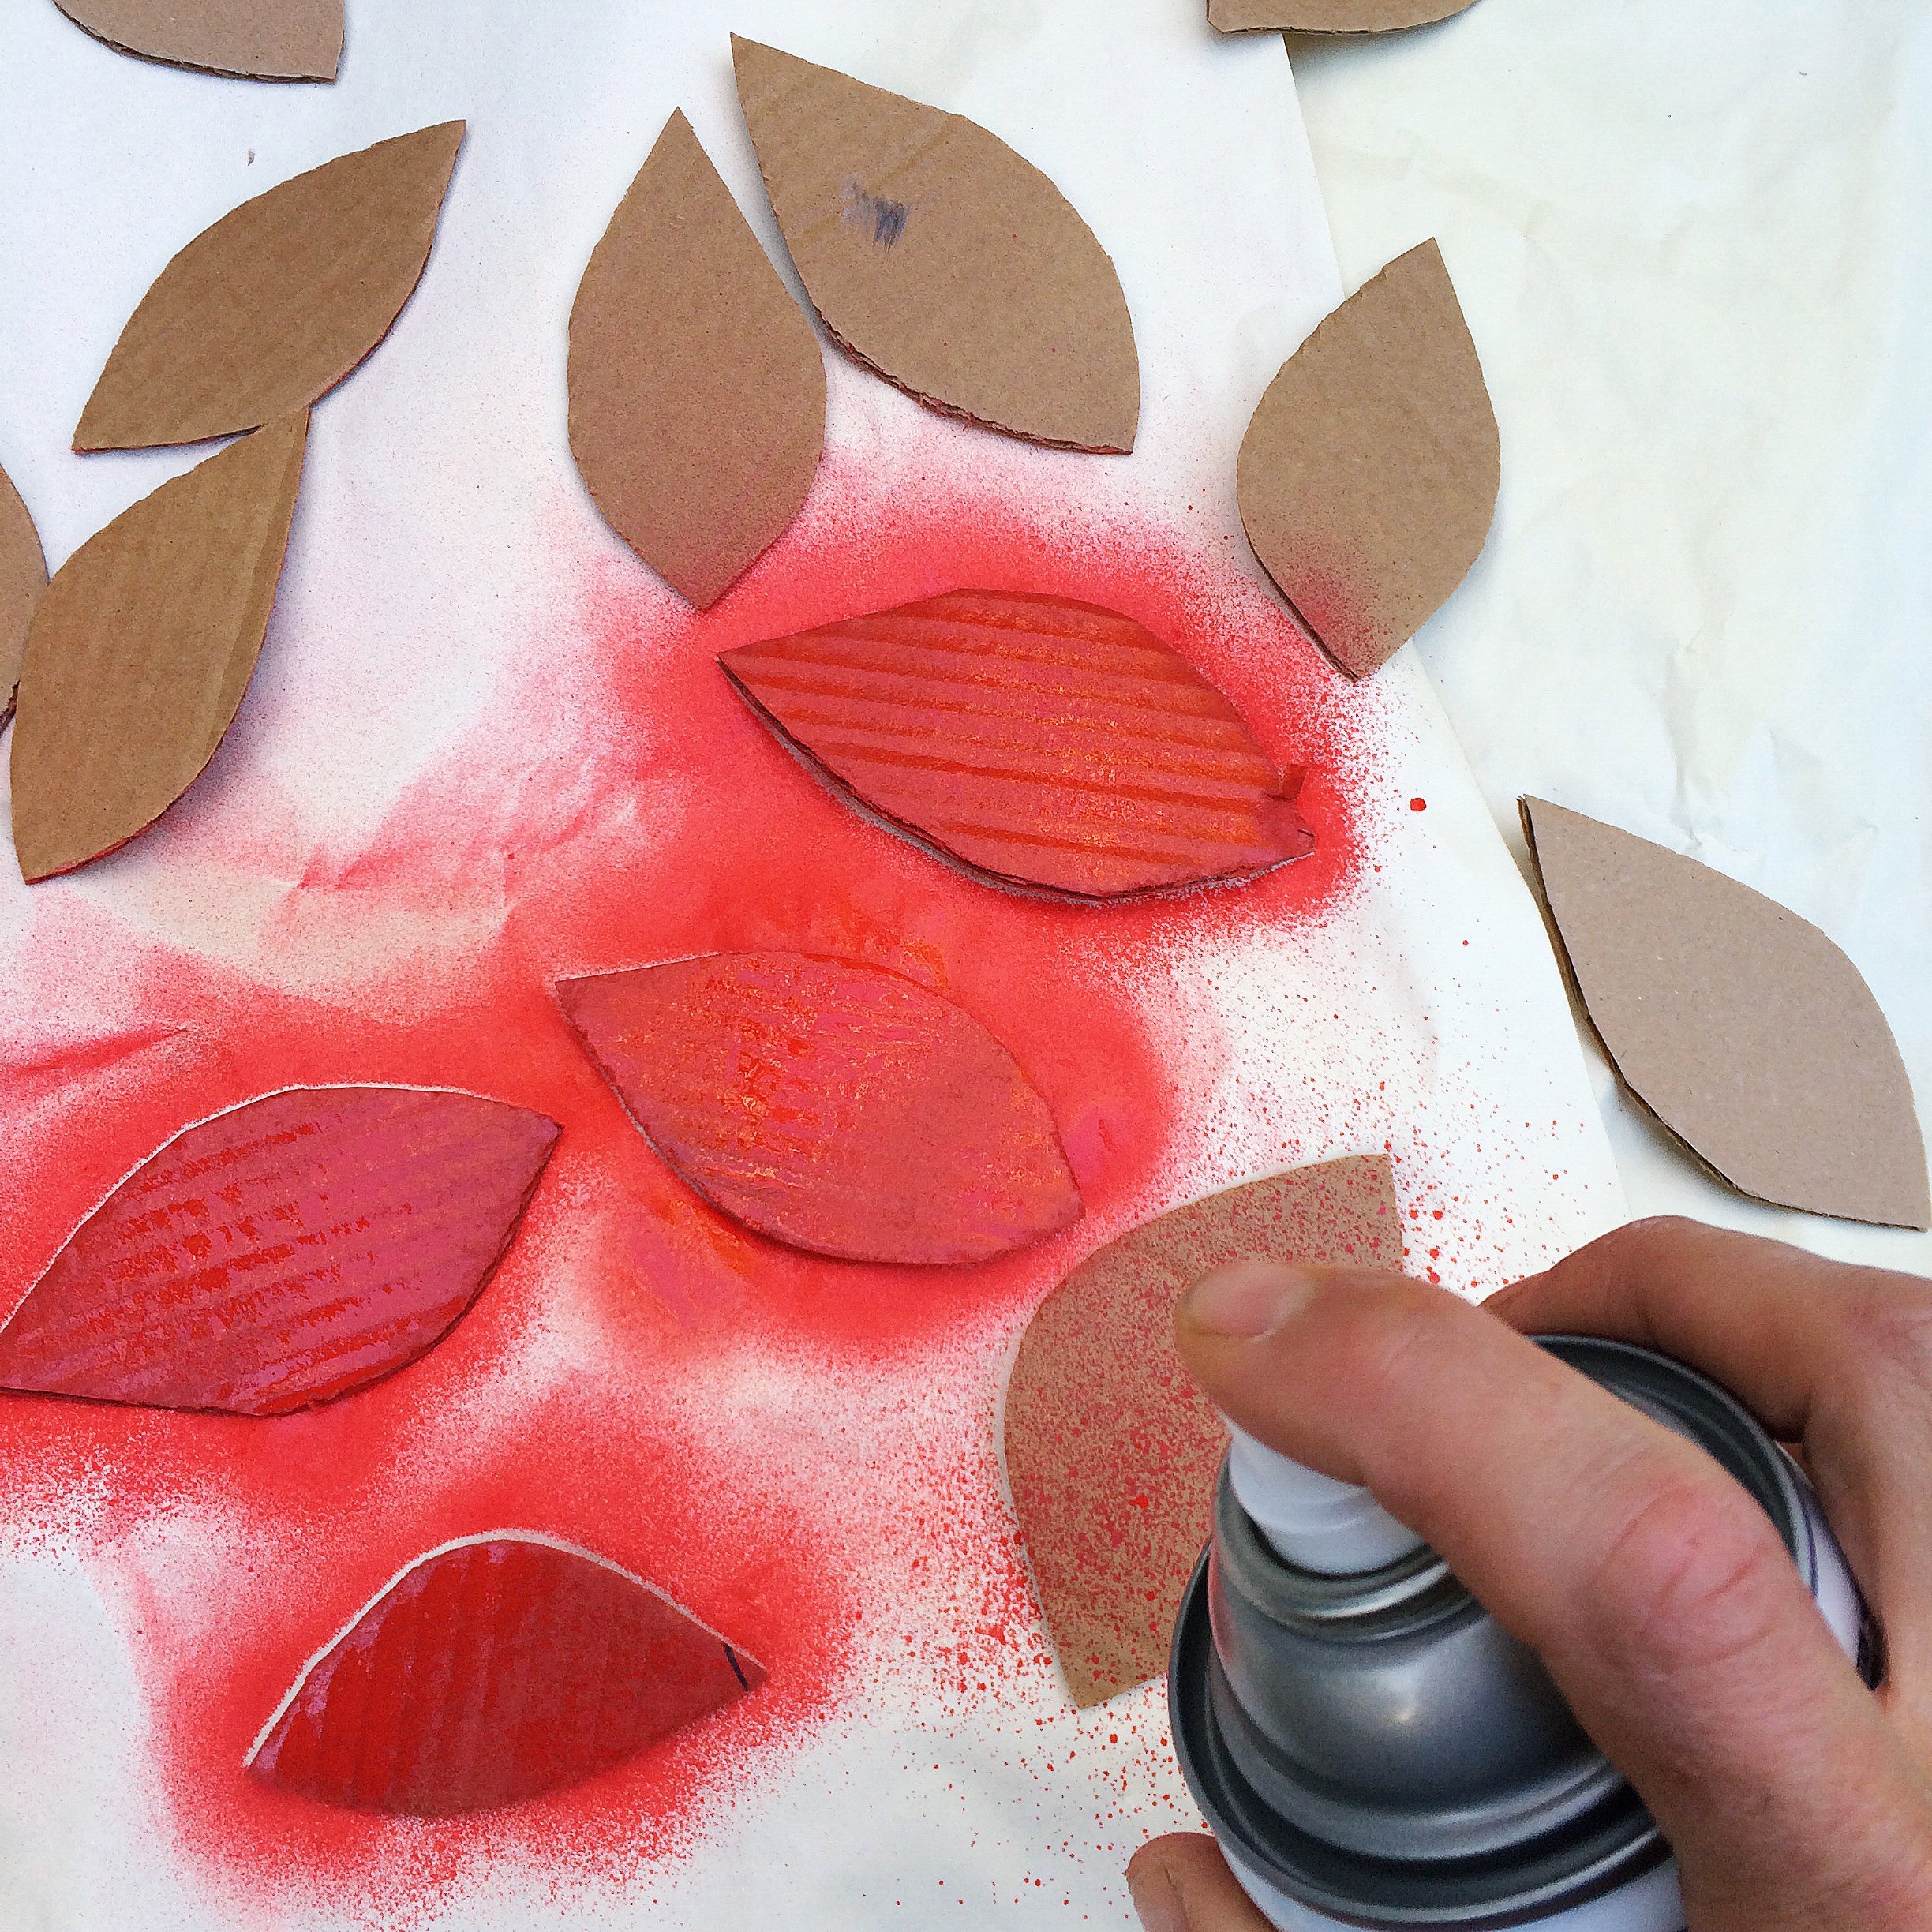

4. To save time I spray pained about two thirds of the leaves red and green. This is totally optional as it’s fine to just paint them freehand. It is a good trick though to keep the project looking unified as small kids will tend just to smoosh all the colours together.
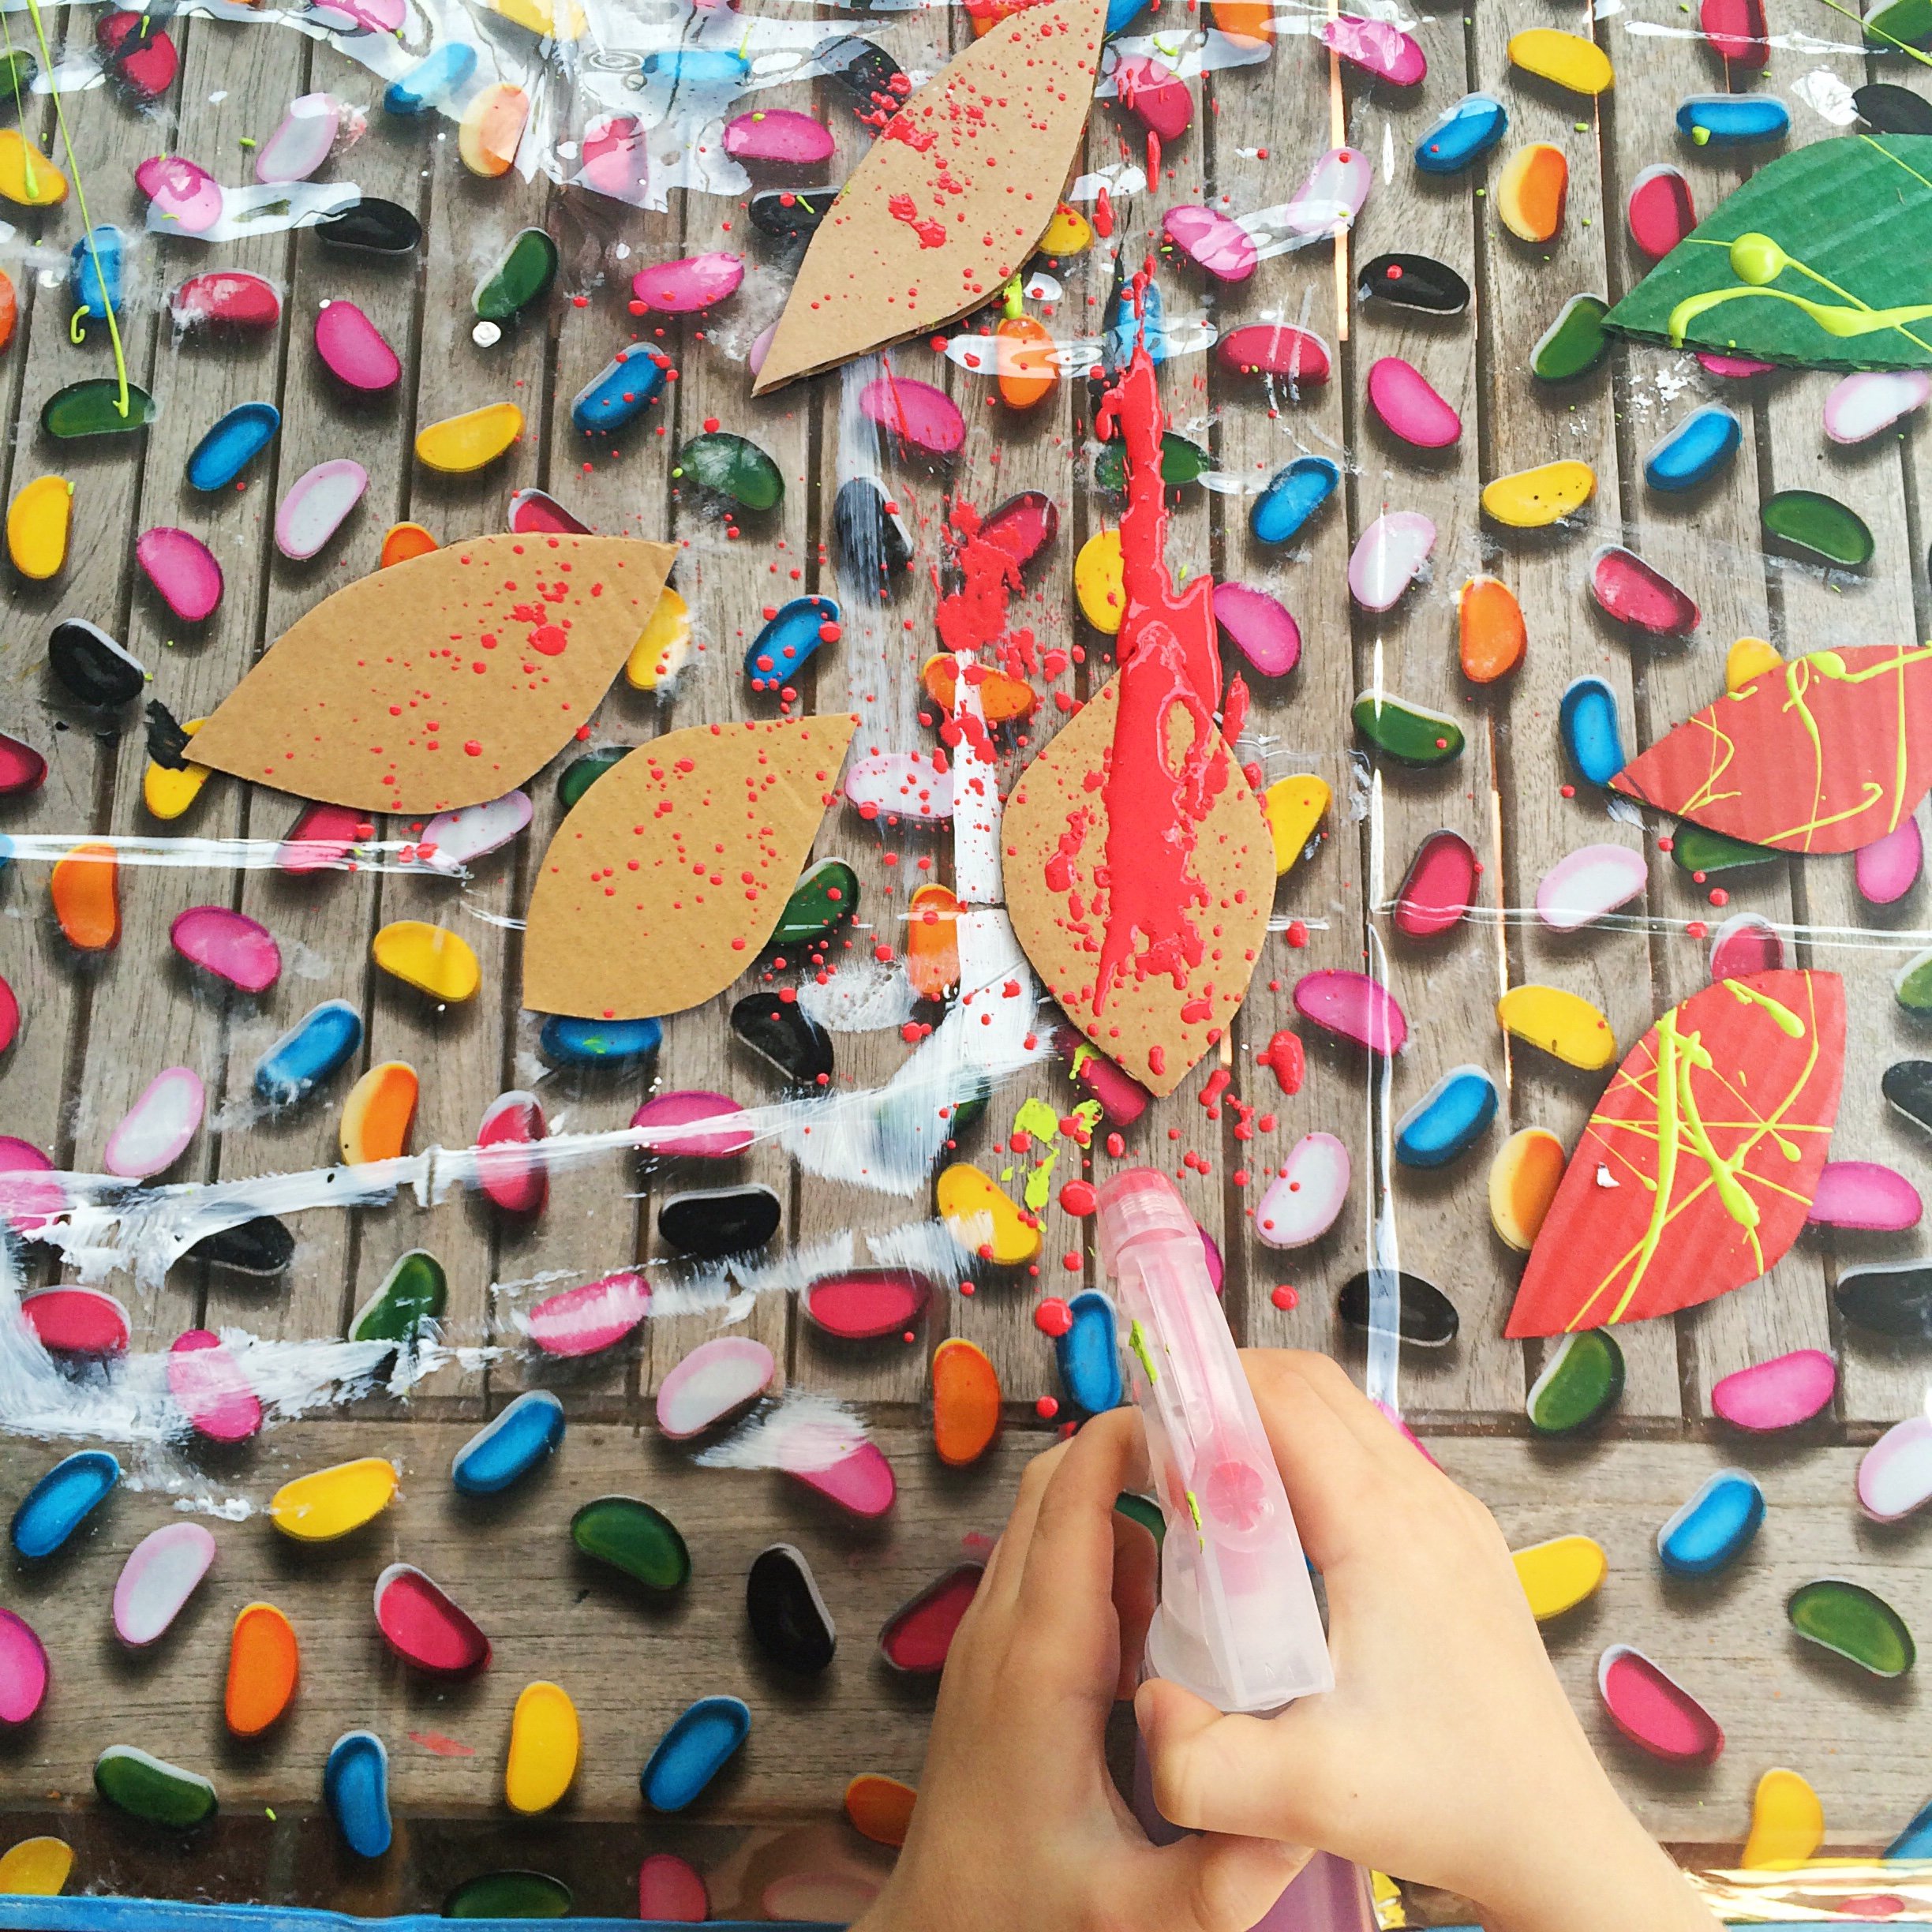
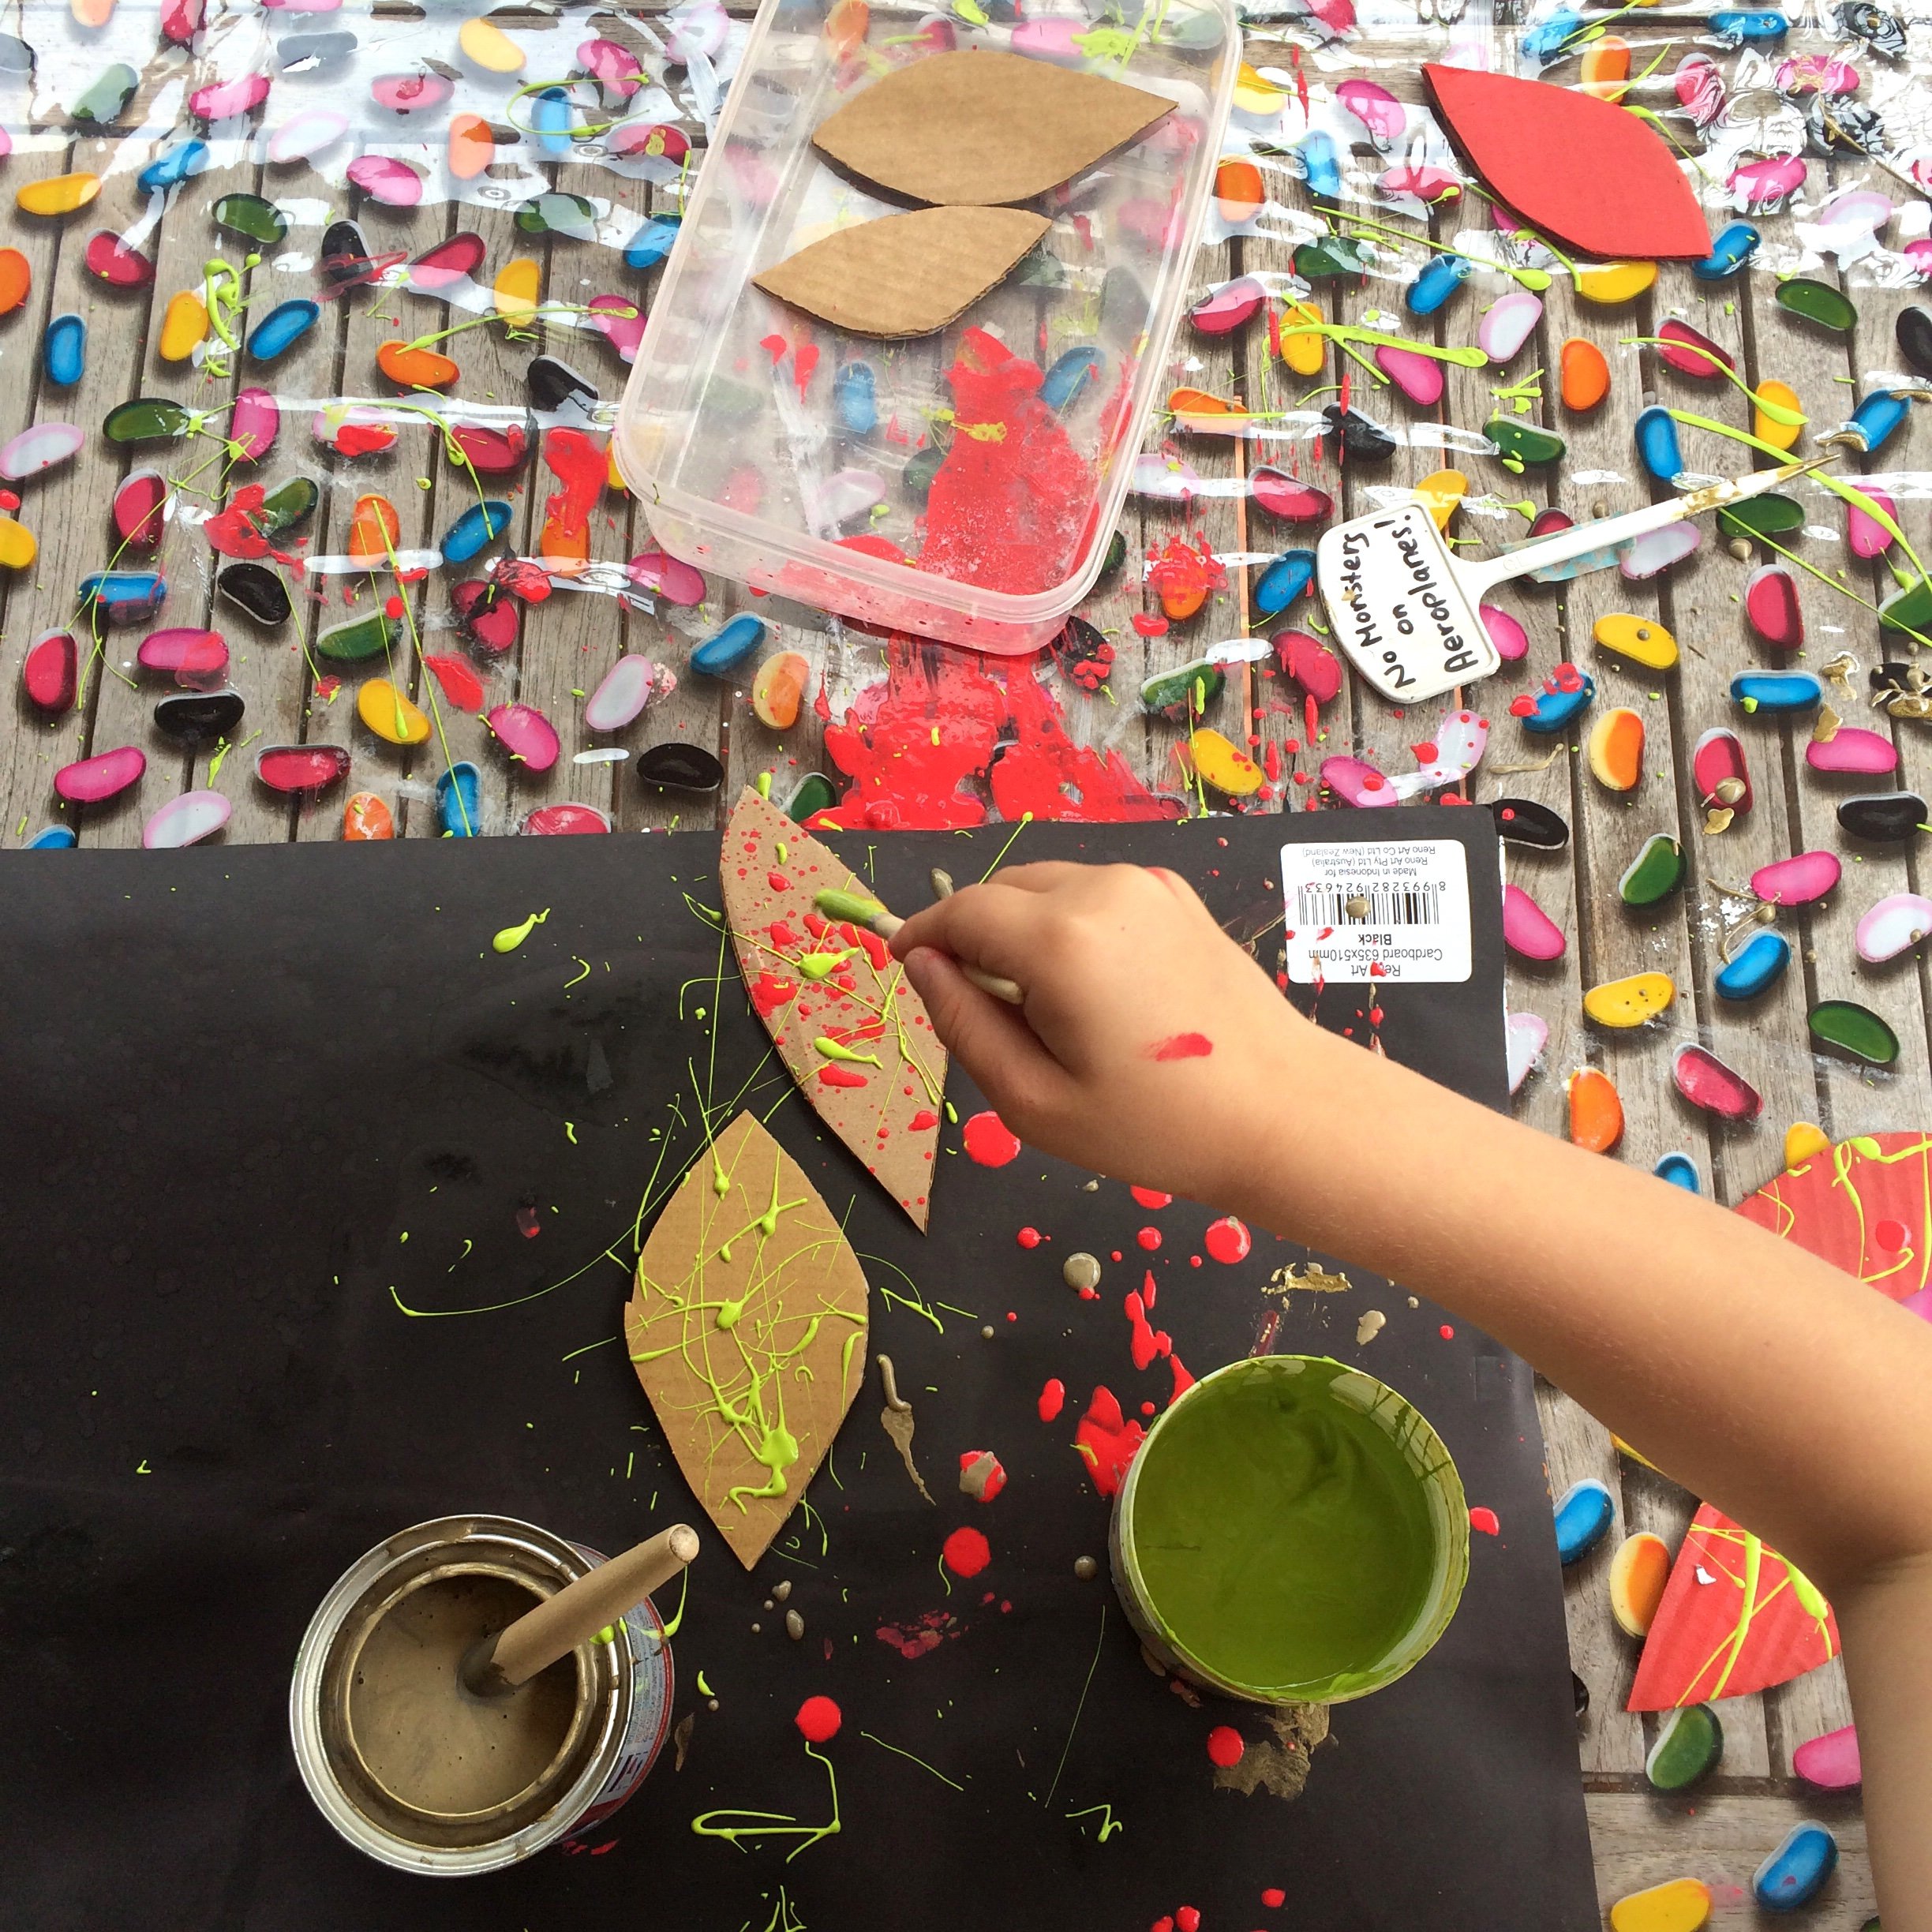
5. Once dry, bring out some spray bottles and brushes and have fun sploshing on some paint. I demonstrated how to dribble and splash. Spraying needed no explanation…
How you approach this process is really up to you but I recommend you keep a few leaves aside that remain plain as these will be a nice contrast to the crazy ones when you assemble it.

6. Start assembling the leaves on your wreath by adding two leaves to the top as shown in the picture.
7. Layer the next few leaves on top of the first two as shown above. You will notice the 3rd and 4th leaves kind of point upwards and then an even pair is laid on top of this leaf on either side.

8. Continue adding pairs of leaves to each side until you have reached all the way to the bottom and are left with a small gap not big enough for another pair on either side.

9. Add an extra leaf on each side making sure it fans down.
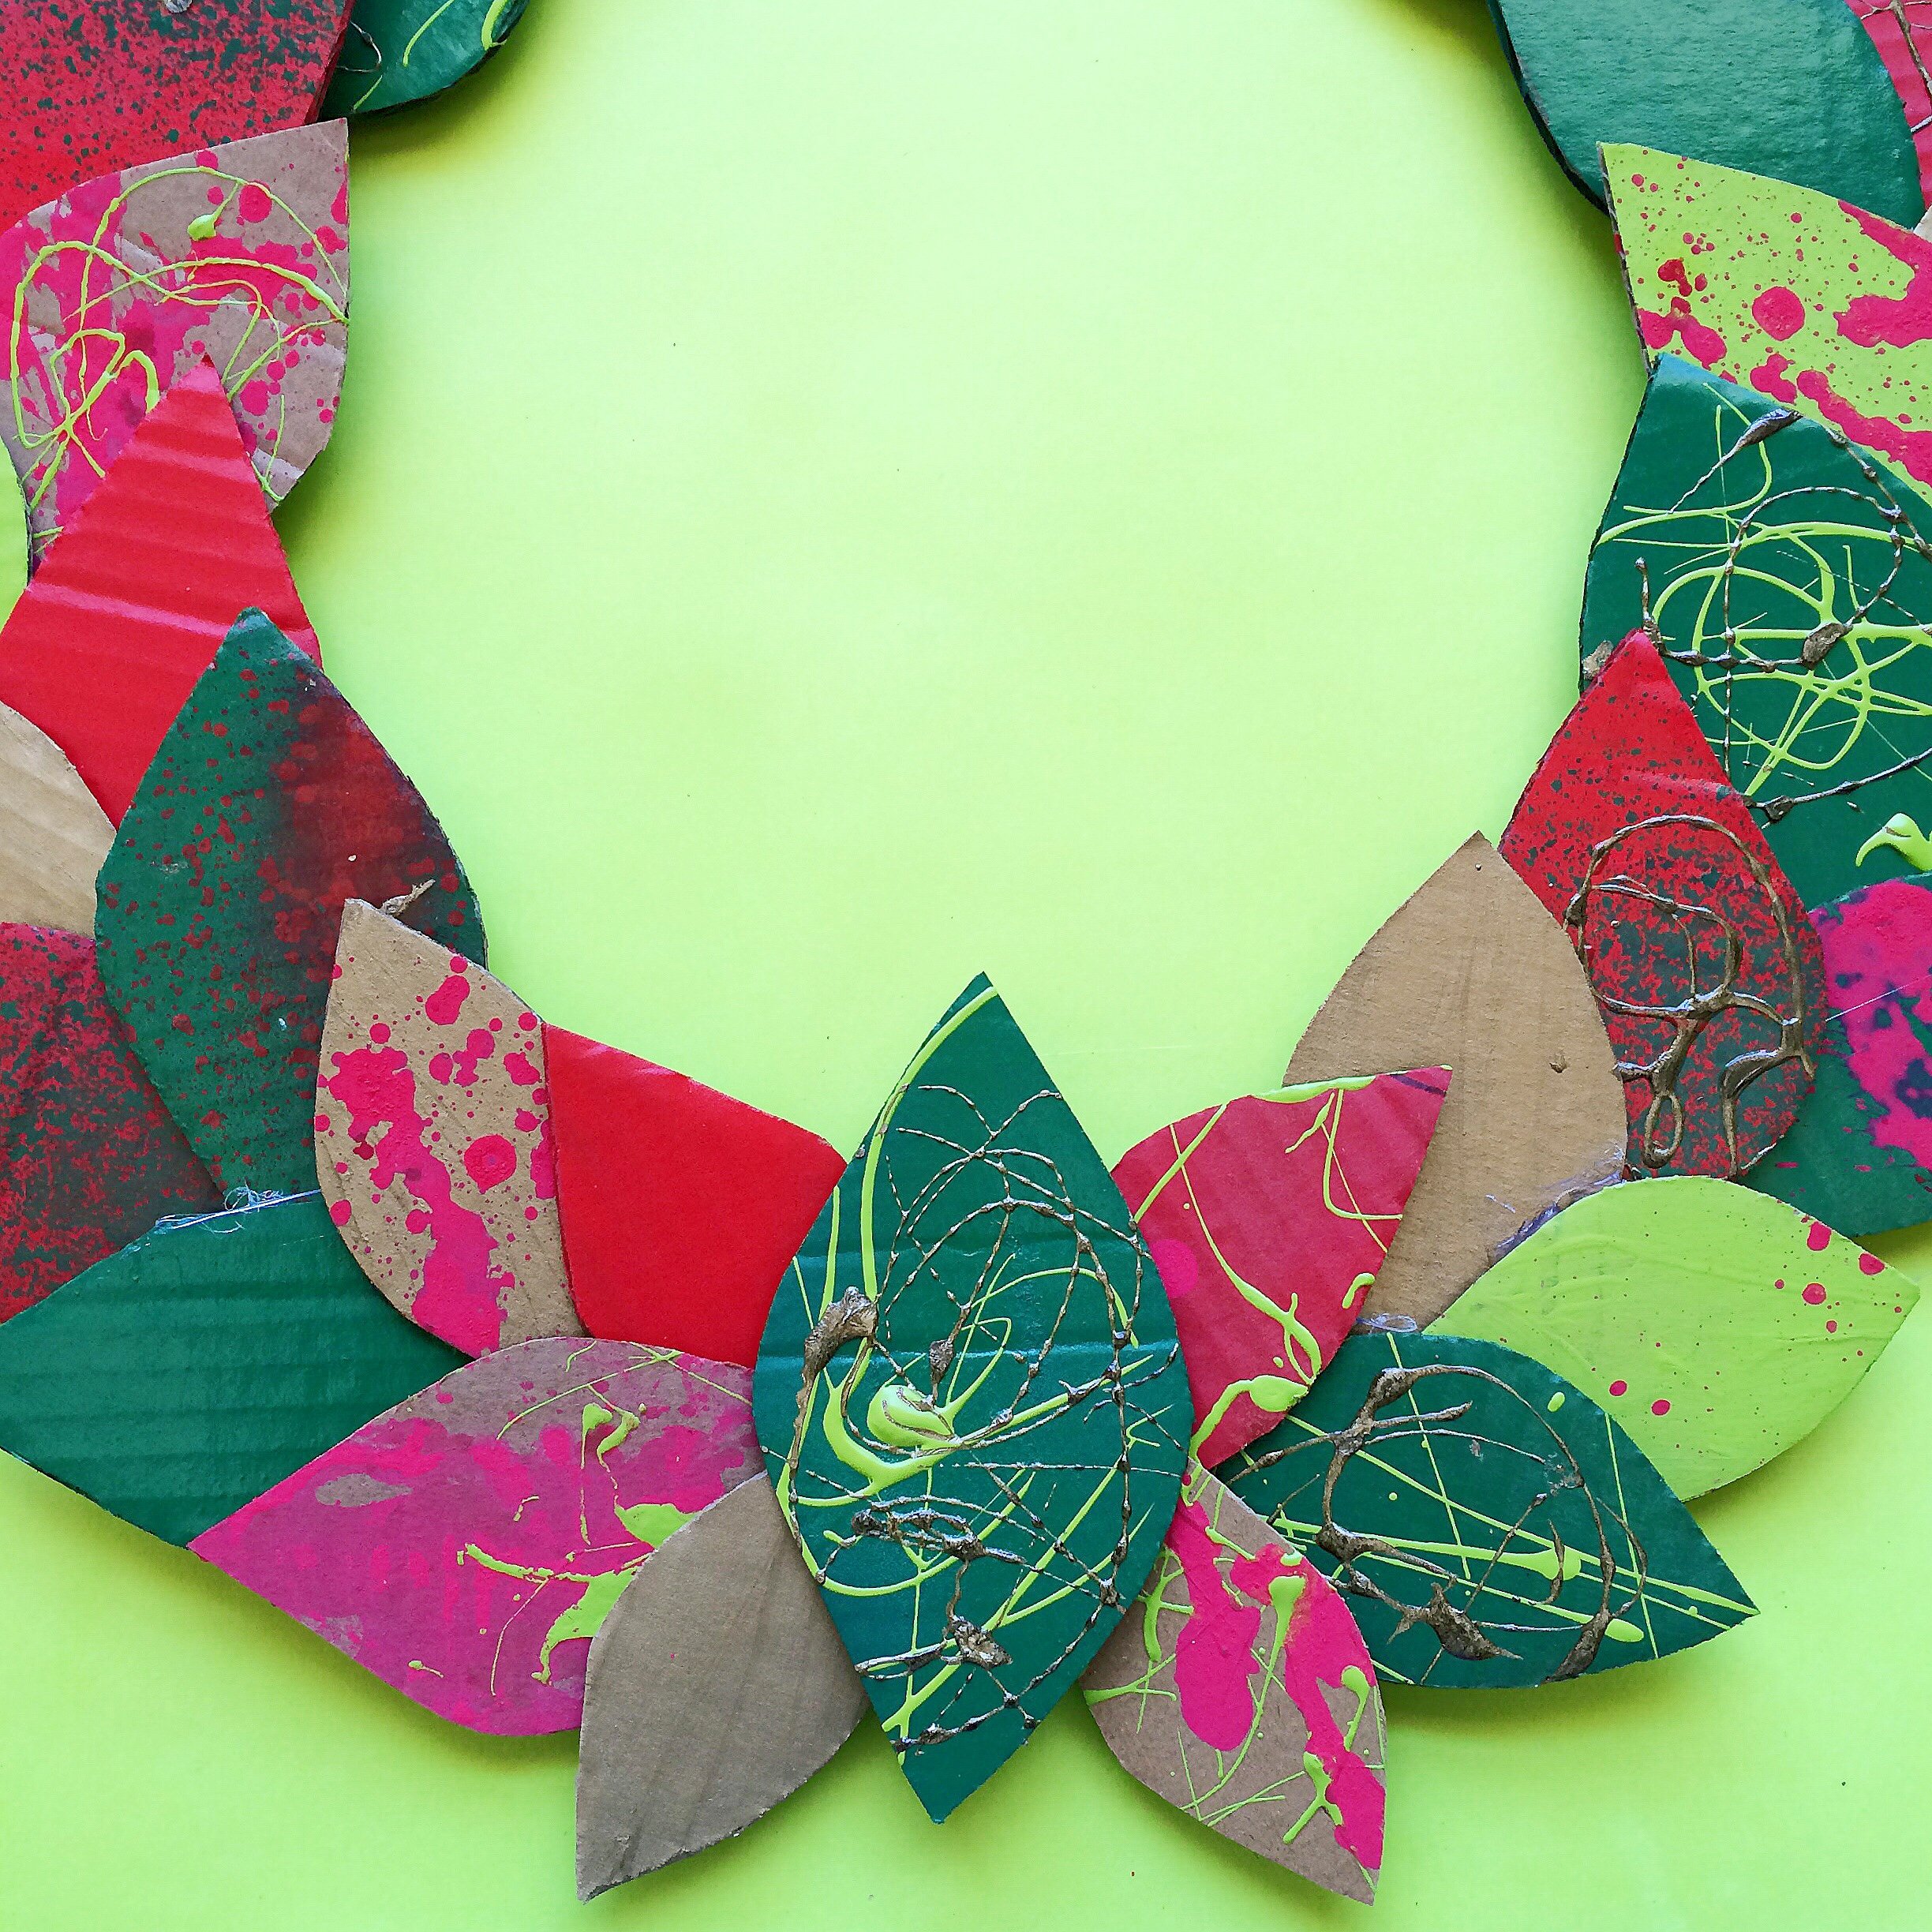
10. Add a final leaf to the centre.
